 AnnoshotmacOS app
Capture, mark up, copy. Show what you mean.
Add boxes, arrows, and text as you capture — copied straight to your clipboard. Keyboard-centric, barely any mouse. For bug reports, code reviews, and AI prompts.
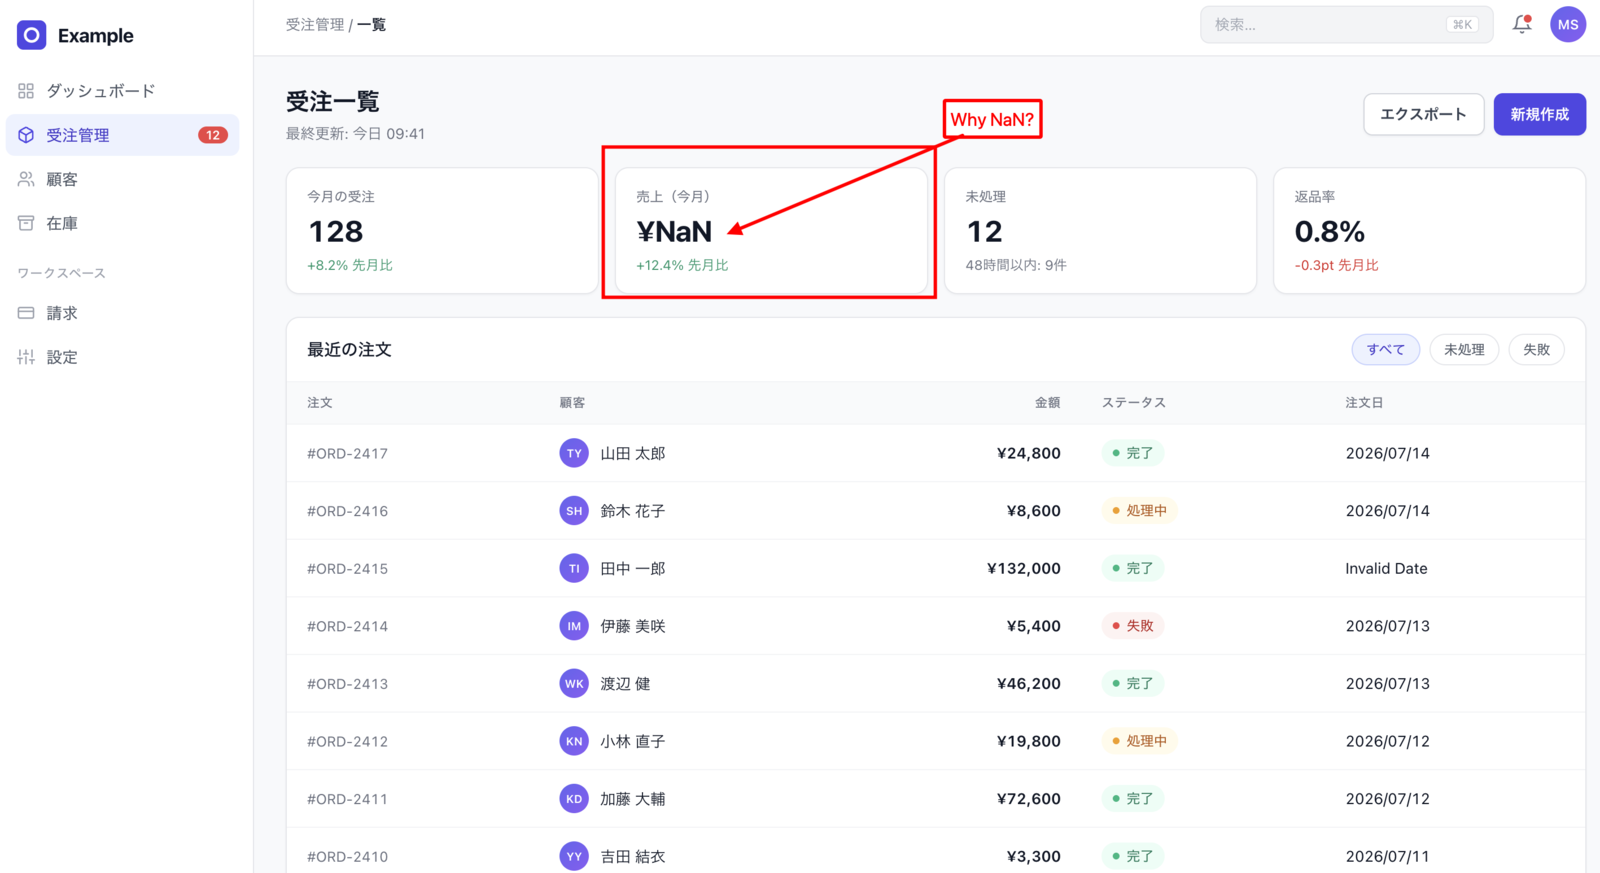
Do any of these happen when you share a screenshot?
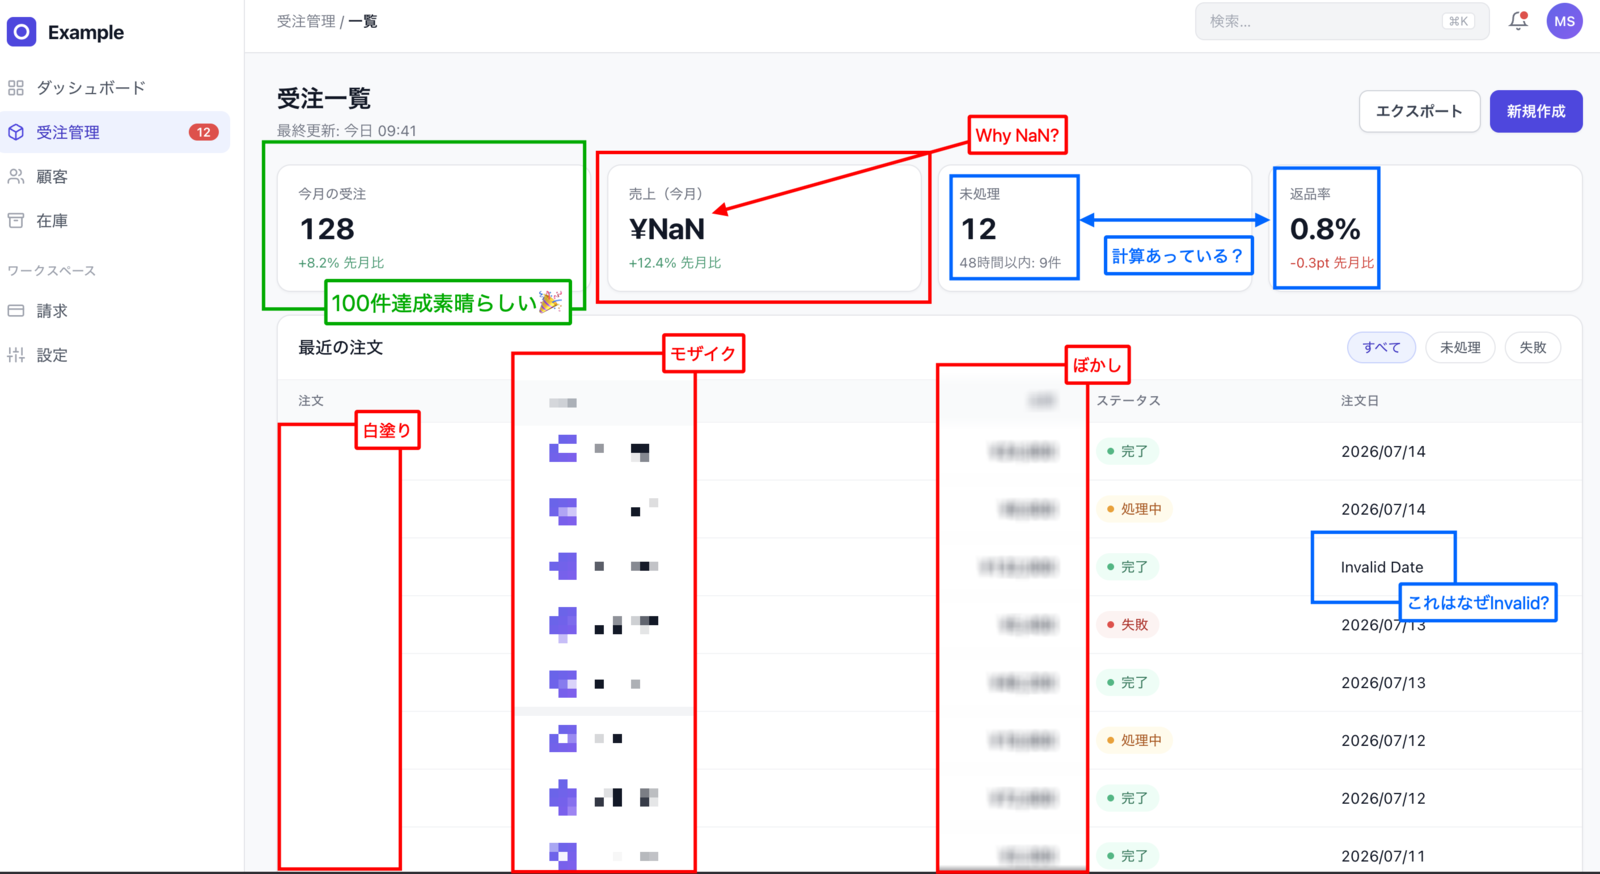
Mark it up in the same motion, then copy.
The editor opens the moment you finish selecting a region, and a drag adds a box, an arrow, or text. When you are done, it goes to the clipboard — no round trip through a separate image editor.
Why Annoshot works
Drag across what you want to circle for a rectangle, drag in a direction for an arrow, start typing where you want a label. Annotations snap to each other and to screen edges, so lining things up costs no time.
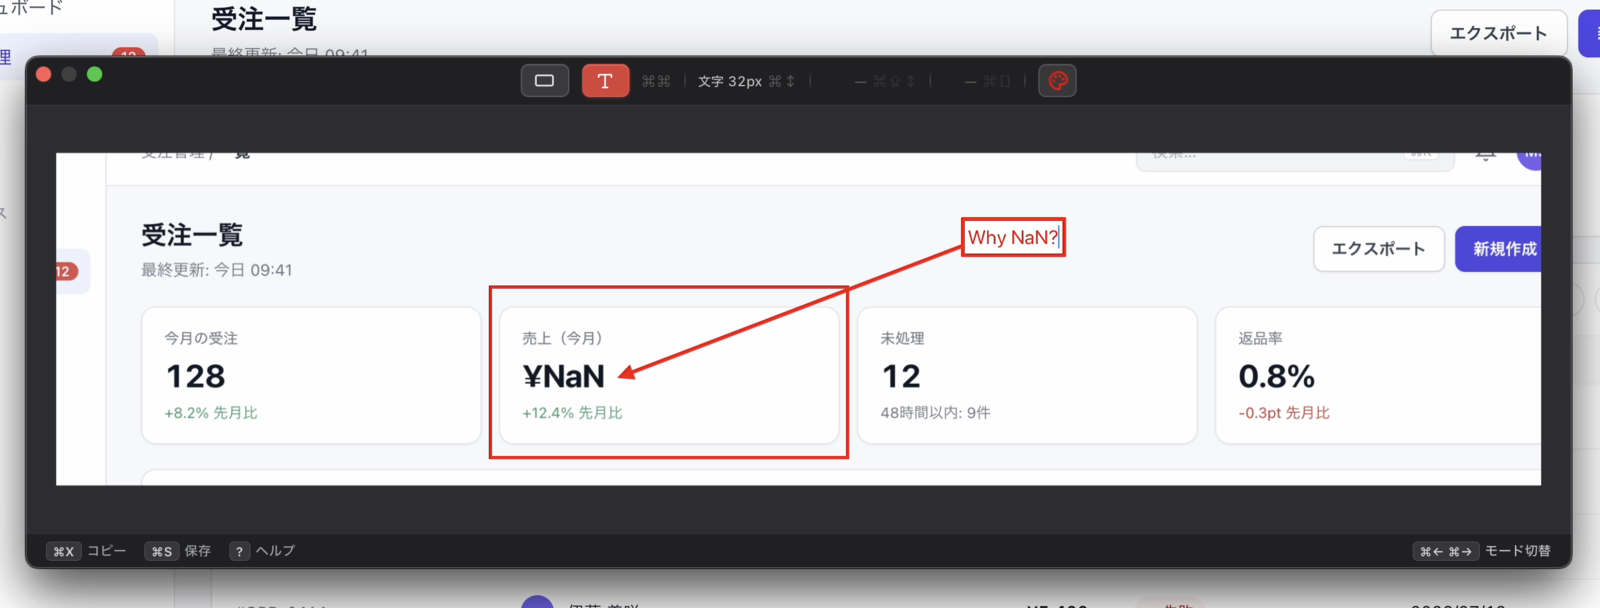
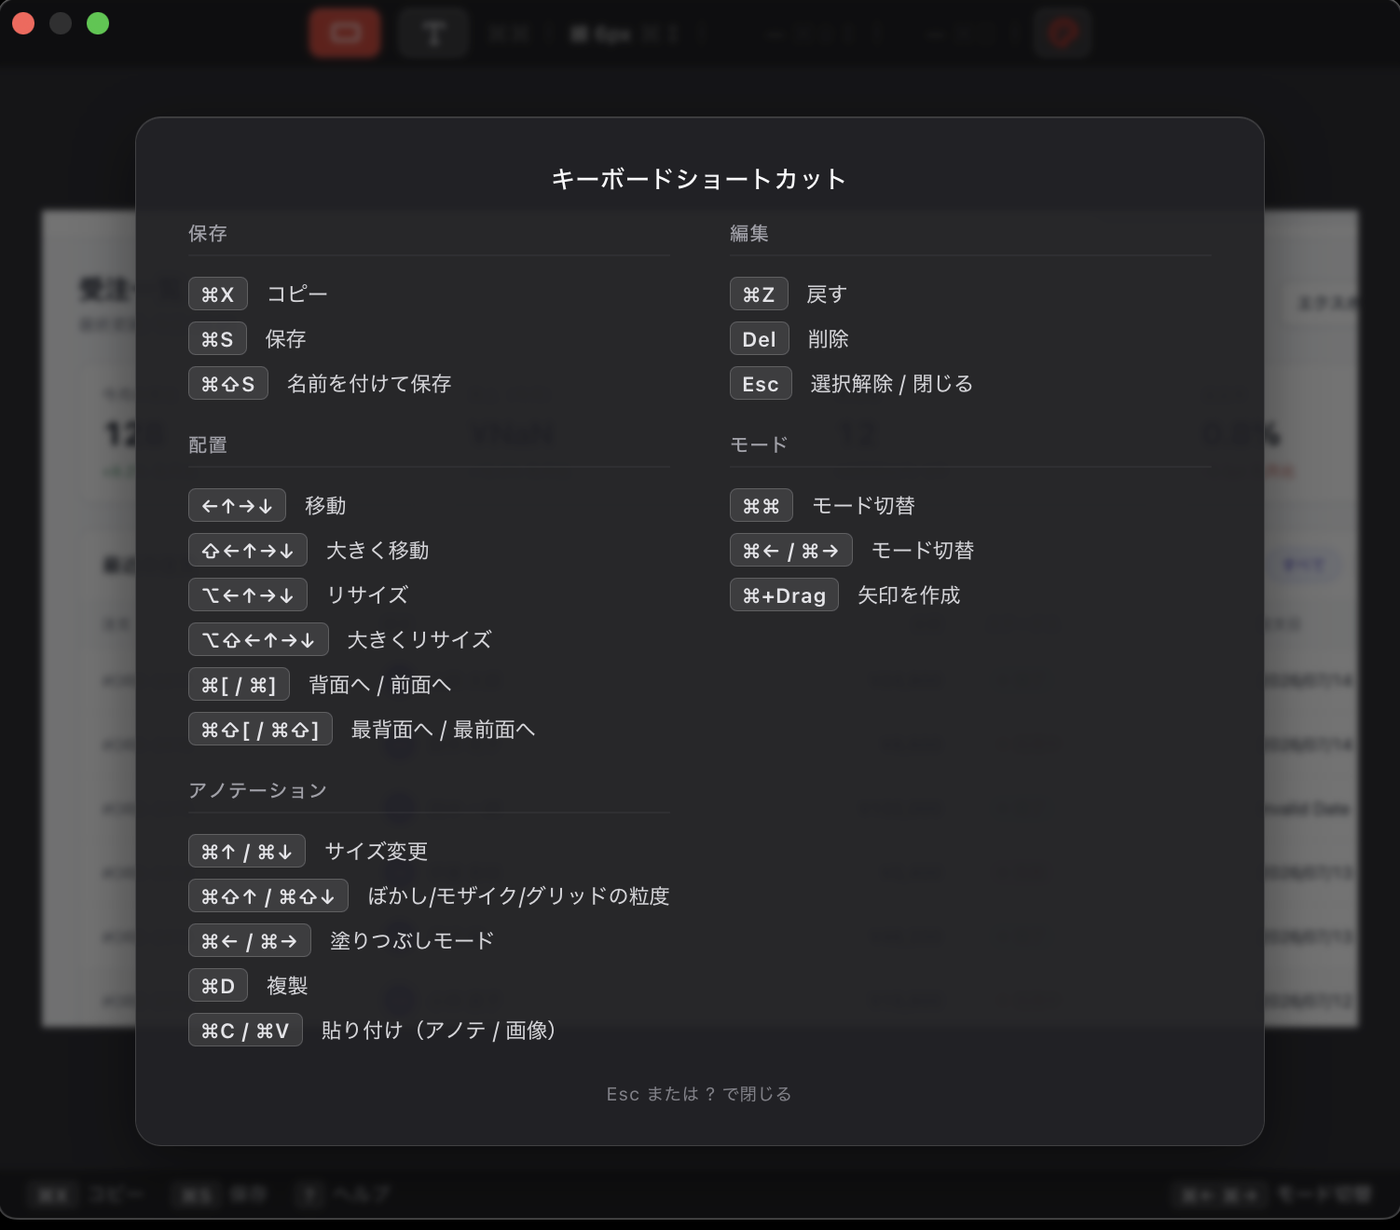
Switching between rectangle and text, changing colors and sizes, selecting, duplicating, undoing, copying, saving — all directly from the keyboard, so mouse use stays minimal.
Copying writes TIFF, PNG, file URL, and plain text at once, so it pastes cleanly in Slack, GitHub, browsers, and AI assistant chat boxes.
Key features
What it needs, and how it handles your data
- Requirements
- macOS 14 Sonoma or later.
- Screen Recording Permission
- Used only to take screenshots. A guide on first launch walks you through granting it in System Settings.
- Network
- Annoshot makes no network connections. Nothing you capture or edit leaves your Mac.
- History Storage
- History is stored on your Mac purely for use inside the app. There is no feature that sends it anywhere.
- Auto-Delete
- Saved files older than a set period can be deleted automatically (off by default).
- Account
- No account, no data collection.
- Price
- Buy once, use forever. No subscription.
Give it a try
Get it from the Mac App Store.
macOS 14 Sonoma or later · Screen Recording permission required · One-time purchase, no subscription